
How to make fabric table napkins with Ric Rac trim.
Creating you own table napkins is a great way to add a personal touch to your dining decor. It is a fun and easy sewing project for all levels.
If you are new to sewing this is a great little tutorial to get you started, and if you have been sewing a while then these will be a quick make for you. With a few basic materials - your favourite fabrics and ric rac trim you can make some amazing diy table napkins.
These creative table napkins are great gift ideas for a housewarming present, birthday or Christmas. You could even make them up in your favourite Halloween fabric for your diy Halloween decor.

Fabric Requirements
Let’s get started. Below are the fabric requirements that you will need for 1 table napkin:-
1 x 16.5 inch piece of fabric for the top of your napkin
1 x 16.5 inch piece of fabric for the bottom of your napkin
1 3/4 metres Ric rac trim. I have used 1/2 inch sized ric rac for my napkins.
Fat quarter bundles are great for this project with a contrasting backing fabric.

How to sew your diy table napkins
Once you have cut your fabric to size head over to the sewing machine. I have used an orange thread for the top, and a green thread in the bobbin for my napkins.

Place your fabric right side up. Grab your ric rac, and lay it on the edge of your fabric, with the outside wavy line in line with the outside edge of your fabric. You can use sewing clips to hold it in place or pins. I haven’t used either for mine, however use what you feel comfortable with.
I recommend that you start mid way down one side of your fabric, and not on the corners, as we want to get a lovely curve to each corner.
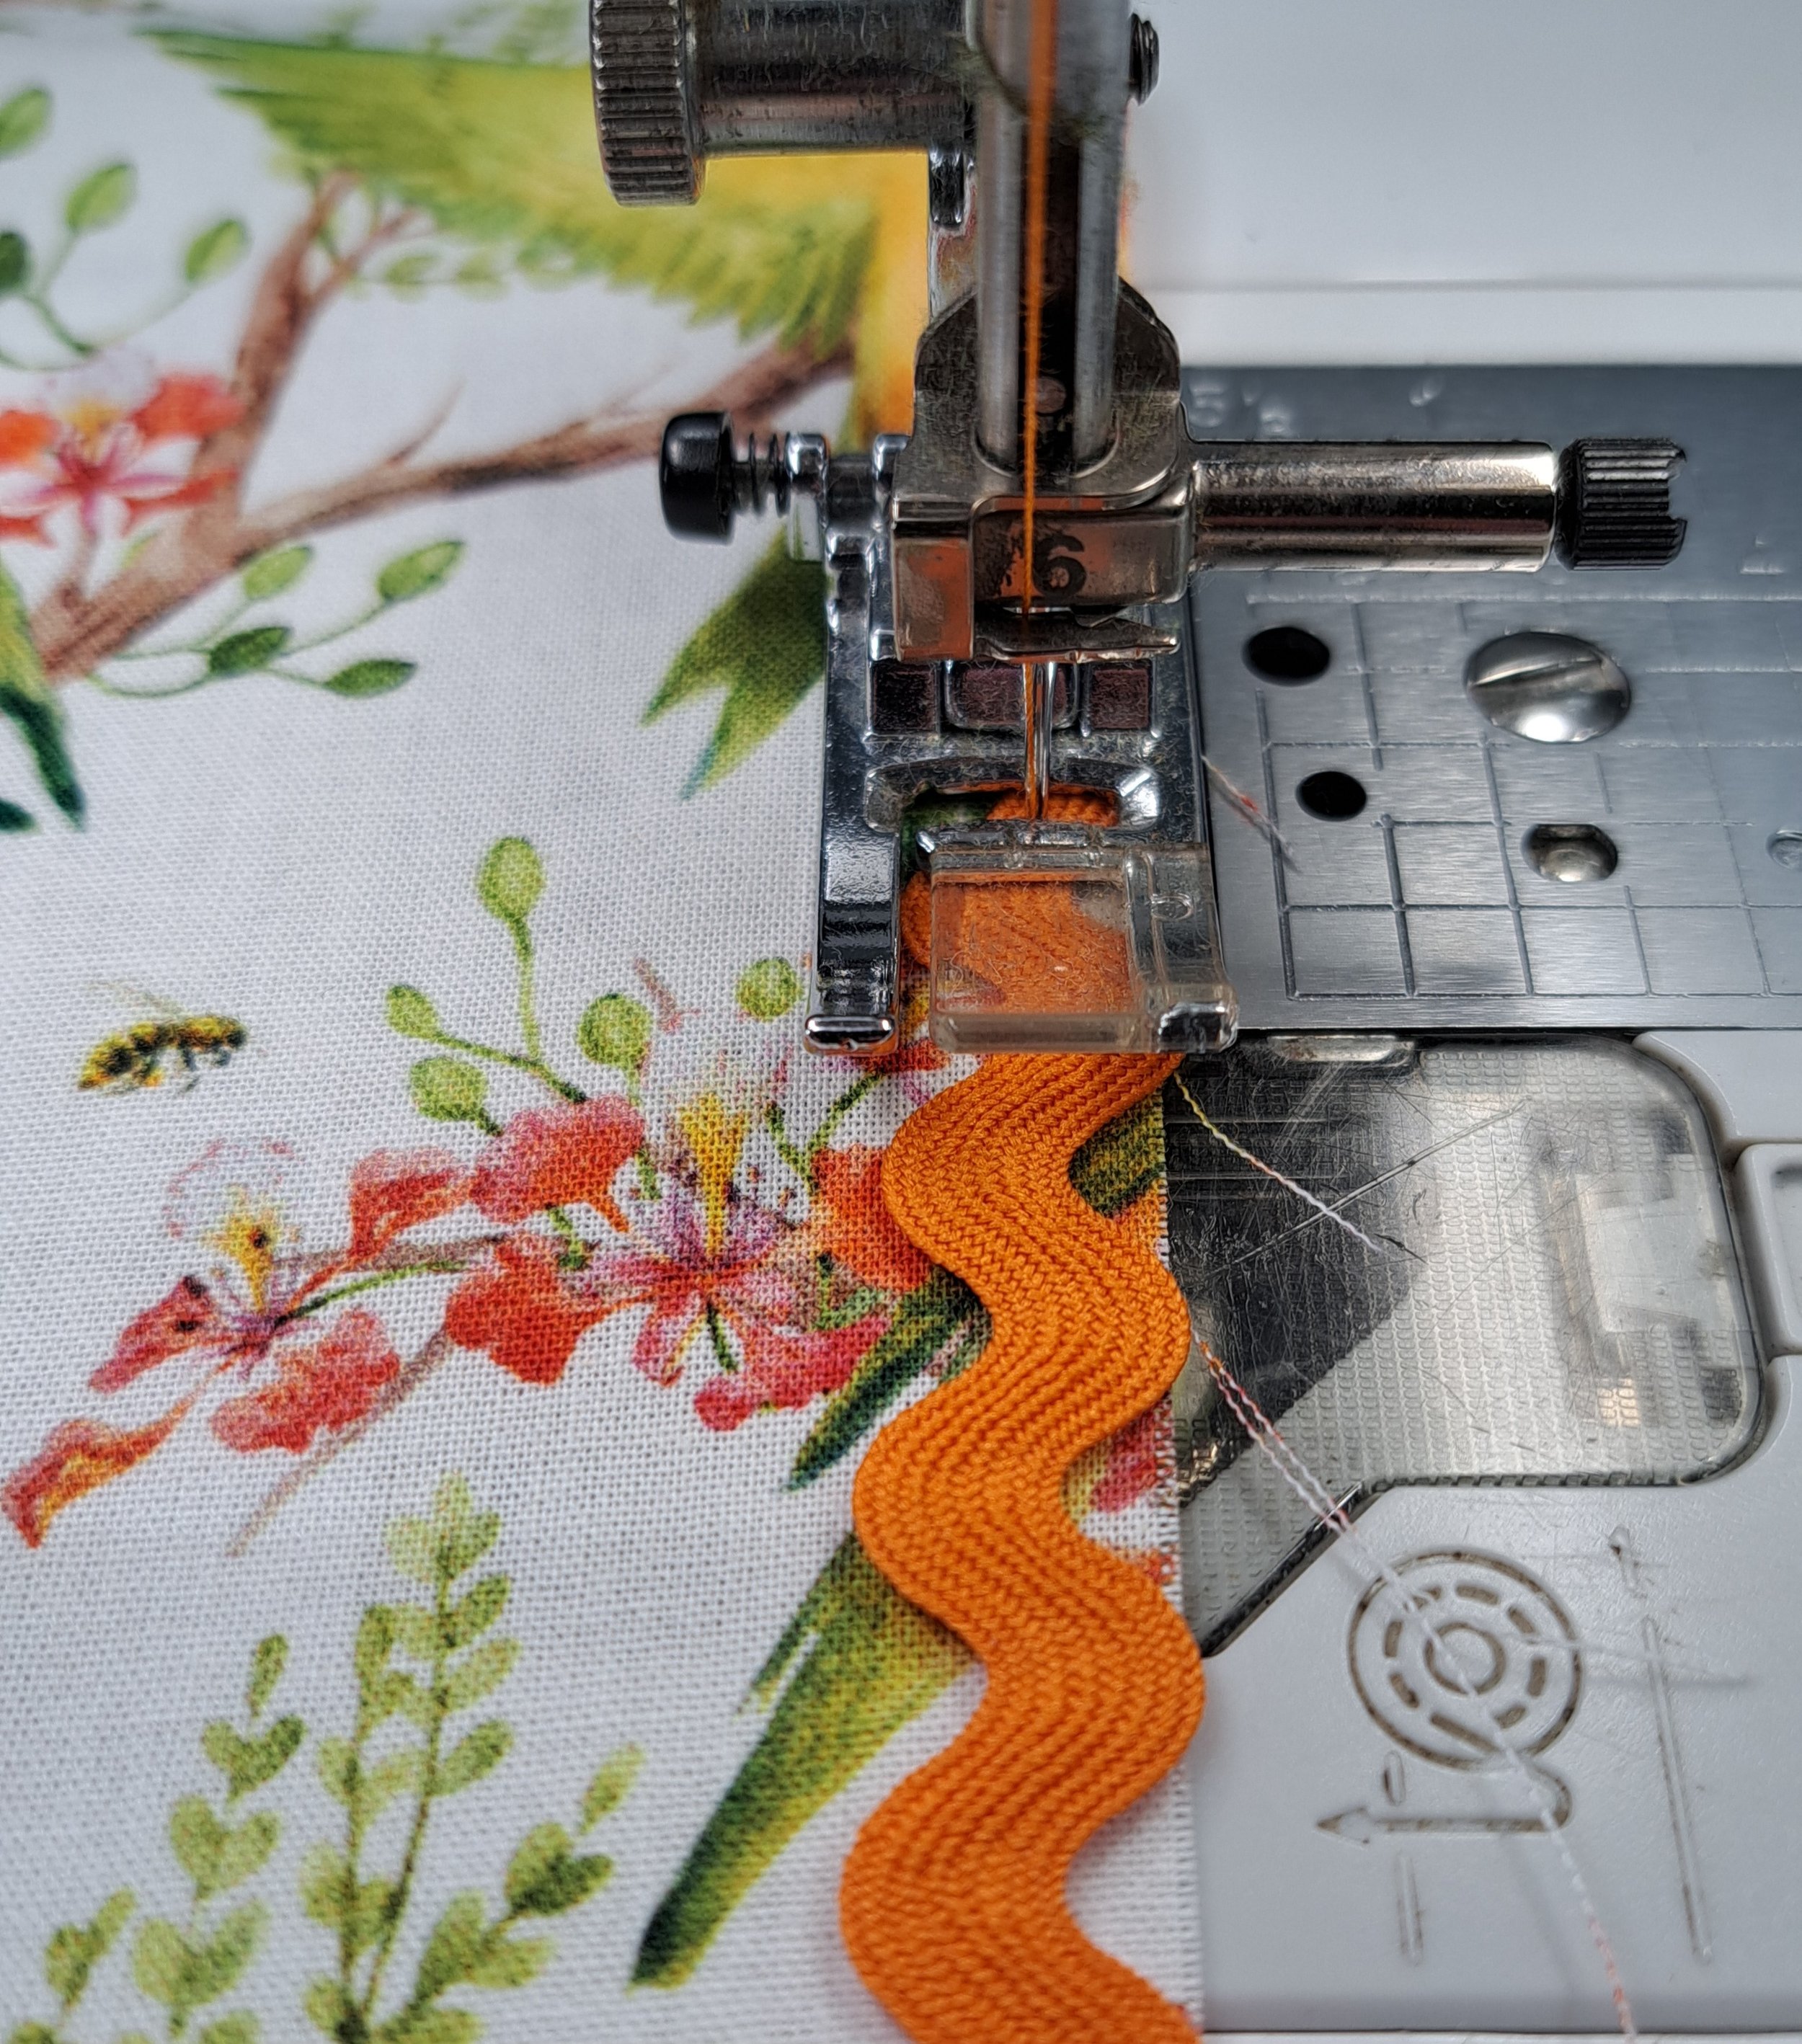
Move the needle so it sits in the middle of the ric rac. Secure your first stitches in place by sewing a couple of stitches and then a couple of back stitches, then start stitching down the centre of the ric rac, and keep the edge of the ric rac in line with the edge of your fabric.

When you get to the corner, you can curve the ric rac around the corner. Don’t cut it. Sew slowly around, moving your fabric every couple of stitches until you are around the corner and onto the next straight edge of fabric.
Continue until you are back to where you started. I lined the end of my ric rac up with the start of the ric rac, and over lapped it for one of the ric rac waves.

That’s the tricky bit done with. Get the fabric square that you are going to use for the bottom of your homemade table napkin. Place it face down onto the top fabric, so both fabrics are right sides together. I use sewing clips to clip them both together, you can use pins if you prefer.
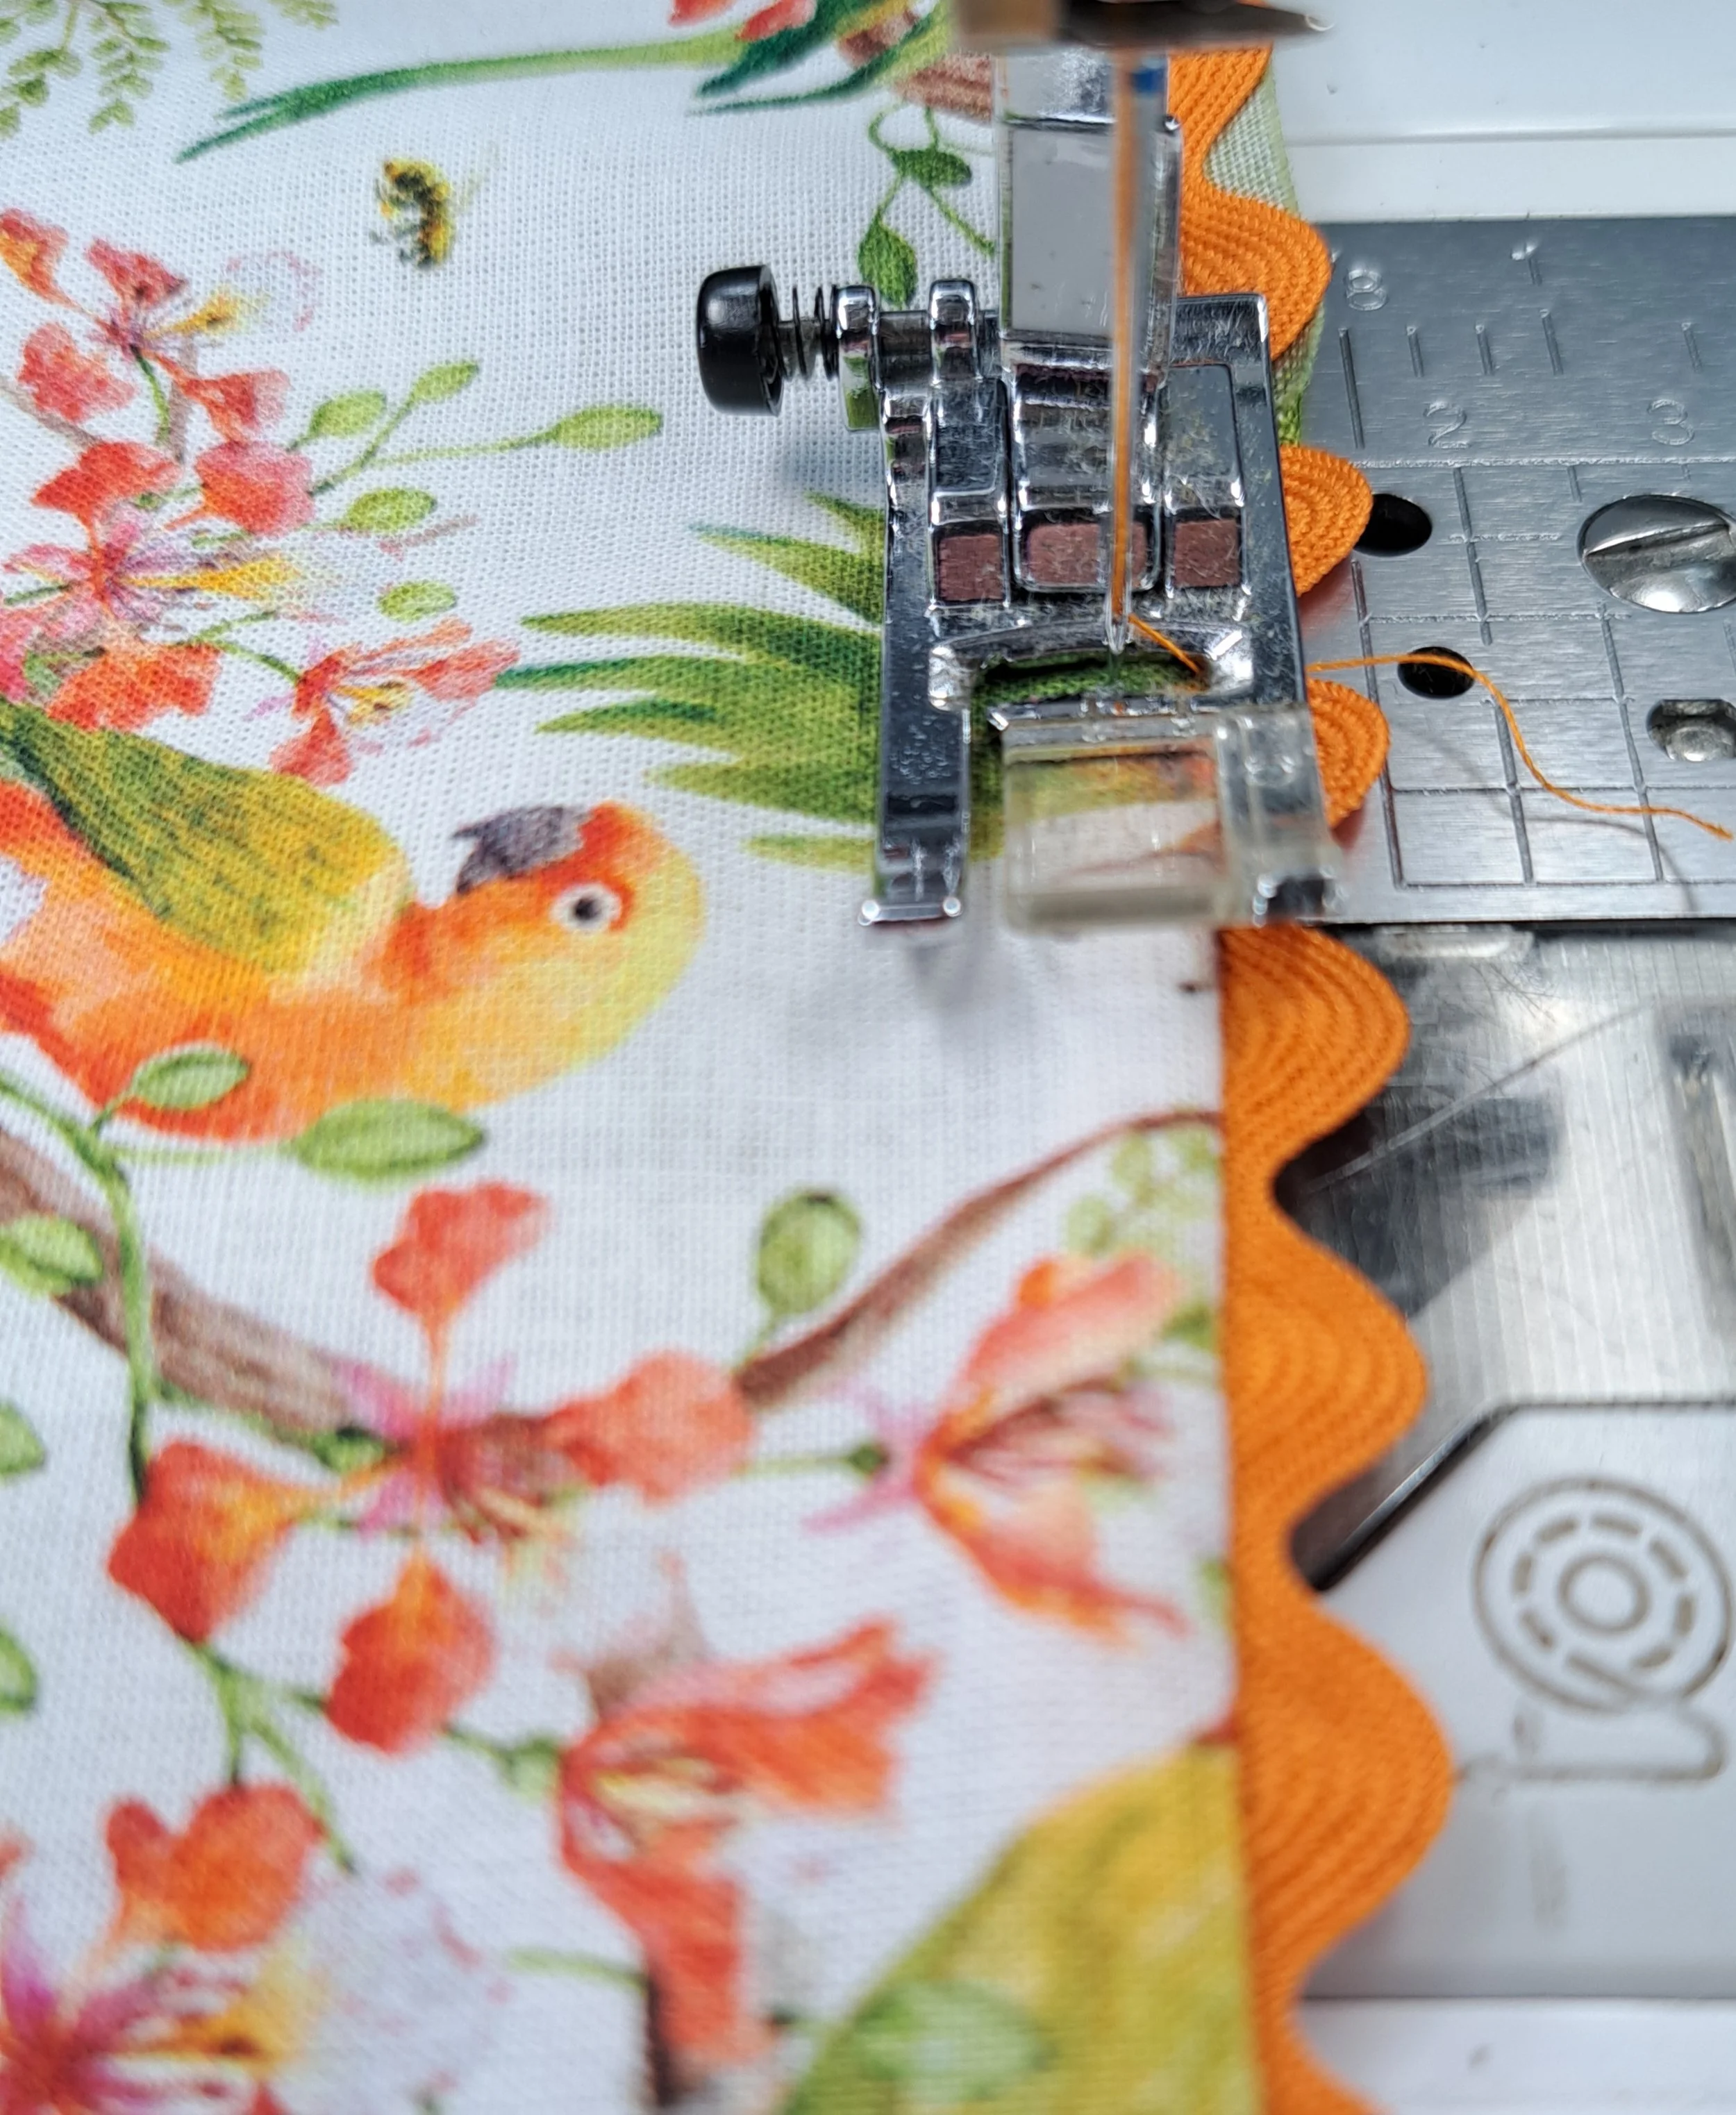
Turn them over, so the wrong side of the top fabric is facing you, (this is the first piece of fabric that you have sewn the ric rac onto) and you can see the stitched line of your ric rac. It is important to have this facing you, as you are going to sew along this line, and use it as a guideline.
Before you start sewing, make two marks on your fabric with your favourite fabric pen on one side of your napkin. Mark these about 4 inches apart. (I like to use a Frixion pen) Don’t sew in between these marks, as once you have sewn all the way around, you are going to turn your fabric inside out through this gap. Don’t worry, we are going to sew it up using a top stitch later on.

You are now ready to start stitching on top of the stitched line, all the way around, until you get to the pen mark on your fabric. Start off with securing your stitches in place as you did before. Follow the stitched line around the corners, moving your fabric slowly as you previously did.

Mark your napkin opening before stitching.
Once you get to the other end, secure your stitches in place and cut your thread, and remember to leave a gap in between the pen marks, to turn this the right way out.

Trim the edges of your corners, so there is no bulk of fabric left on each corner.

You can see here the curved edge of the corner that has just been cut.
You are now ready to turn your fabric inside out.

Get your pokey stick, or chop stick and gently push the corners out.

Use a chop stick or pokey tool to poke the edges out.
Adding the finishing Touches
Take your napkin to your pressing station, and start at the gap that you left. Turn your bottom fabric in 1/4 inch or slightly more and then press. Do the same with your top fabric.

Press your decorative napkin project

Now press around the edge of the napkin, taking your time. You might need to roll the fabric with your fingers so you don’t get any creases to either the front or the back of the fabric on the napkin. Do this all the way around the napkin.

Use sewing clips to clip the gap together, or pins if you prefer.
You are now ready to top stitch around the edge of your fabric. I position my needle to about an eighth of an inch, so we are stitching really close to the edge of the napkin. We are not sewing on the ric rac.
Top stitch to create a lovely finish to your decorative table napkin.
Pull your bobbin thread to the top, and secure your stitches in place by stitching a couple of stitches, then back stitching a couple of stitches.
Start off by top stitching the gap closed, and then stitch all the way around until you are back at the beginning. Secure those stitches in place as before, and snip off any threads.
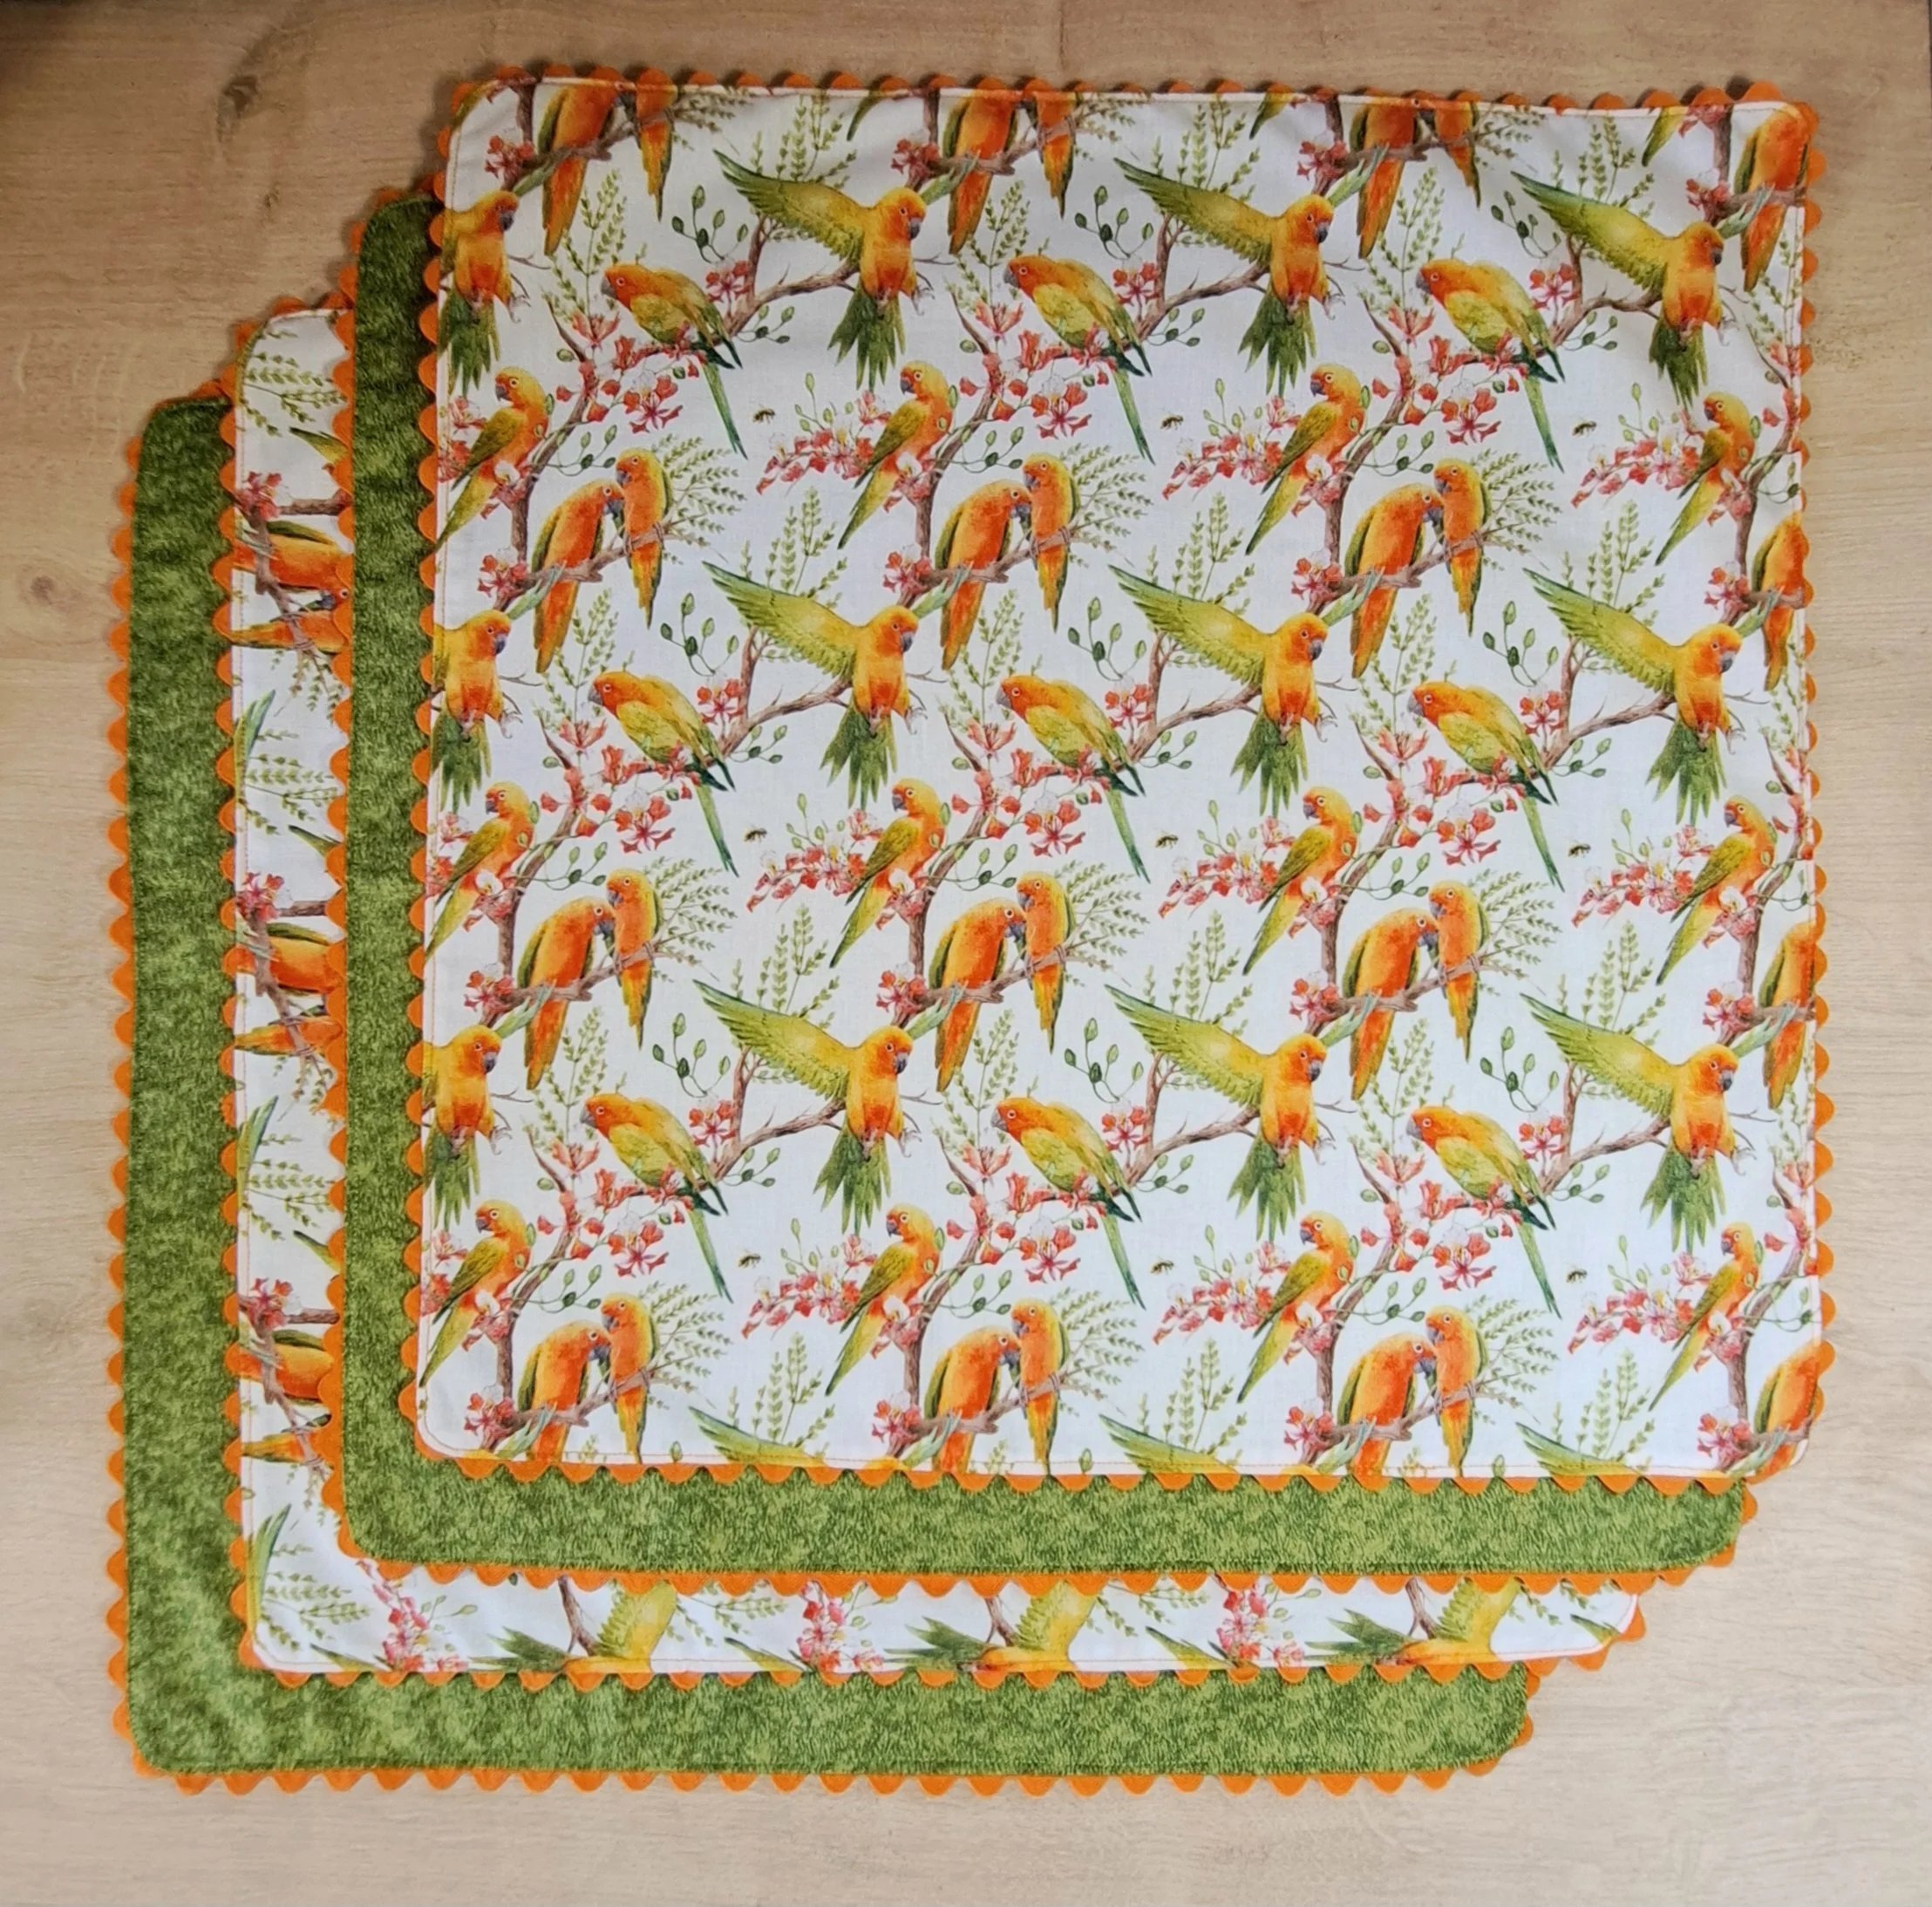
You now have one beautiful DIY table napkin.
Watch this 10 minute video which takes you step by step on how to make your DIY holiday napkins.
This is such a simple Ric Rac trim project, I am sure you will be making lots more, and I would love for you to share any pictures with me. Sign up to my newsletter to keep up to date with the latest news.